Empower your users to search your website content for keywords so that they can quickly discover relevant content.
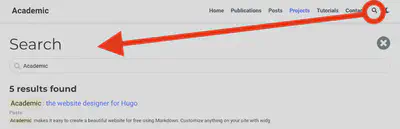
If search is enabled, a search icon will automatically appear in the navigation bar, and a search box will appear in the sidebar of any content using the docs/tutorial layout (as can be seen on this site). Clicking the search icon will toggle the search dialog.
Keyboard shortcuts are available to facilitate searching. Pressing / will toggle the search dialog and pressing ESC will close the dialog.
It’s possible to customize the search system to your needs. The search feature may either be powered by the built-in algorithm (default) or powered by Algolia. Alternatively, you can disable the integrated search engine and instead create your own third party (e.g. Google) search widget by following the guide in the Alternatives section below.
Built-in search engine
Wowchemy comes with its own integrated search engine. If it’s not already enabled, it can be enabled by setting provider: wowchemy under search in config/_default/params.yaml.
You can fine-tune search relevance by tweaking the default options in params.yaml:
features:
  search:
    provider: wowchemy
    wowchemy:
      min_length: 1  # Only the matches whose length exceeds this value will be returned.
      threshold: 0.3  # Where 0 requires a perfect match and 1 matches anything.
Note that this search engine runs entirely in the web browser on the visitor’s device. Thus, it is not scalable to an extremely large number of pages. If you have a very large amount of content and find the search running slowly, we recommend opting for a server-side search engine such as Algolia or Google (see below).
Algolia
- Register a free Algolia account and follow their wizard to create a new search app
- Build your site by running the
hugocommand in Terminal or Command Prompt - Upload the generated
public/index.jsonfile to the Indicies page in your Algolia dashboard - Paste the Algolia App ID, API Key, and Index Name from the Indicies and API Keys pages of your Algolia Dashboard into the
algoliasection of yourconfig/_default/params.yaml- see the example below - Set the search provider in
config/_default/params.yamltoprovider: algoliato activate the Algolia search engine, as seen below - Serve (or build and upload) your site and test out the shiny new search widget on your home page 😄
Example params.yaml excerpt:
features:
  search:
    provider: algolia
    algolia:
      app_id: 'PASTE ID'
      api_key: 'PASTE KEY'
      index_name: 'PASTE INDEX NAME'
      show_logo: true
Note that whenever your content changes (e.g. you add a new page), you will need to re-build and re-upload the search index to Algolia.
Docsearch
Docsearch is a powerful free search provider for open source documentation sites.
Most popular open source projects use it. If you have searched online documentation before, your search was probably powered by Docsearch!
- Apply to the Docsearch program if your site meets their requirements
- If you accepted into Algolia’s Docsearch program, add the parameters you receive in the email into your
params.yaml:
Example params.yaml excerpt:
features:
  search:
    provider: docsearch
    docsearch:
      app_id: 'PASTE ID'
      api_key: 'PASTE KEY'
      index_name: 'PASTE INDEX NAME'
Algolia will re-index your site occasionally (currently once per week), or you can trigger an instant re-index from their dashboard after significant content changes.
Disable
To disable searching, open config/_default/params.yaml and set provider: '' in the search section.
Alternatives
Alternative search providers, such as Google search, are not integrated with Wowchemy, but can be implemented by creating your own custom widget. For example,
- Create a custom widget in your
/content/home/folder - Signup for Google Custom Search Engine
- Paste the HTML which Google provides into the body of your custom widget