Table of Contents
Create your site
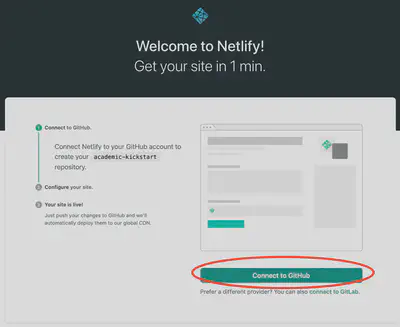
After choosing a template above, you’ll be greeted with the welcome screen below.
Click the big Connect To Github button on the welcome screen (or alternatively click the link underneath to connect with Gitlab):
Login with your Github account (or create a new Github account):

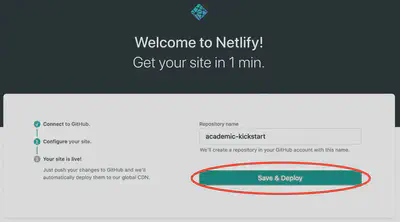
Click Save & Deploy to create a repository for your site in Github:
Netlify will now generate your new site. Generally this takes around 1 to 5 minutes, but can take longer during busy periods. You’ll see the green “Published” notice appear under Production Deploys once it has completed.
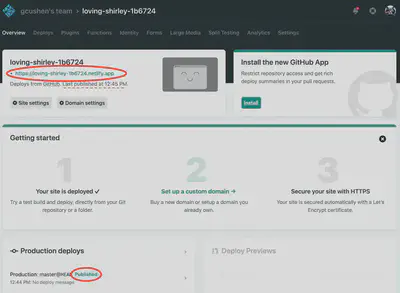
You’ll notice that Netlify assign a free, random URL to the site. Let’s customize the URL to something more relevant. First click Site Settings:
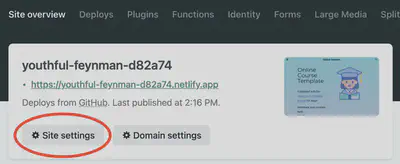
Click Change site name…
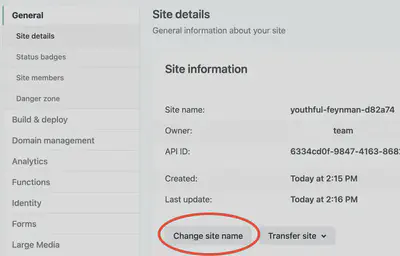
Enter your site’s name, such as your name or organisation name, separating words with a hyphen (-) rather than a space.
Some creativity may be required to find a subdomain that is freely available. Don’t worry about finding the perfect subdomain as later, we’ll register our own custom domain name and connect it with our site.
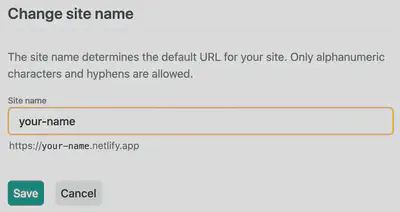
Lastly, click Save to update our Netlify subdomain.
Awesome! We can now visit the site at the URL you chose!
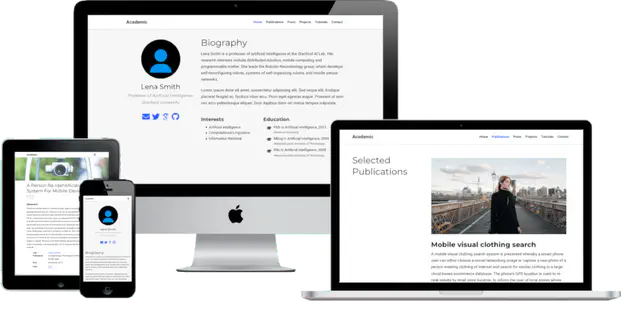
Depending on the template we chose, we’ll see something similar to the Academic Starter Demo, but without the demo content.
Now, let’s personalize our shiny new site based on our requirements ⭐ ⭐ ⭐
Edit your site
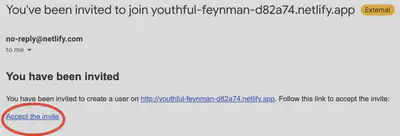
Check your (GitHub) email to accept the invite to edit your site in the admin panel:
If you can’t find the email,
- Go to Settings > Identity, and select Enable Identity service
- Under Registration preferences, select Invite Only
- Scroll down to Services > Git Gateway, and click Enable Git Gateway
- This allows editors to write content without needing a GitHub account
- Head to the Identity tab at the top of the Netlify dashboard and then click the Invite Users button to invite yourself by entering your email address
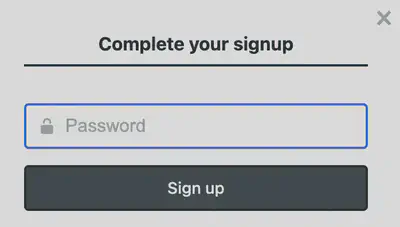
You will then be prompted to create a password:
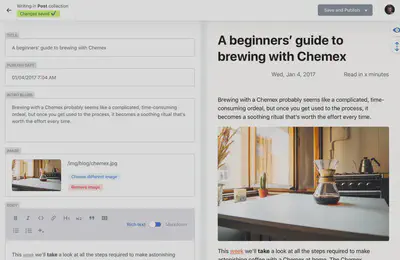
Now you’re ready to edit your site in the CMS:
We ask you, humbly, to support this open source movement
We’ll get straight to the point: Today we ask you to defend Wowchemy’s open source independence 🐧
We’re an open source movement that depends on your support to stay online and thriving, but 99.9% of our creators don’t give; they simply look the other way. If everyone who publishes a site with Wowchemy supported just a little, we could keep Wowchemy thriving for years to come. Becoming a sponsor on GitHub for the price of a cup of coffee is all we ask ☕️
Wowchemy is for empowering content creators, academics, and educators. The heart and soul of Wowchemy is a community of people working to bring you an awesome Hugo website builder along with Hugo themes, and a Hugo CMS 👥
We know that most people will ignore this message. But if Wowchemy is useful to you, please consider becoming a sponsor on GitHub to protect and sustain Wowchemy ❤️
Ways that you can support open source:
- ❤️ Become an open source sponsor on GitHub and unlock these perks whilst supporting further improvements
- ⭐️ Star Wowchemy on GitHub
- Share your new site with the community on Twitter and LinkedIn
- 🧑💻 Collaborate on open source
- add open source volunteering to your CV with opportunities for both coders and non-coders!